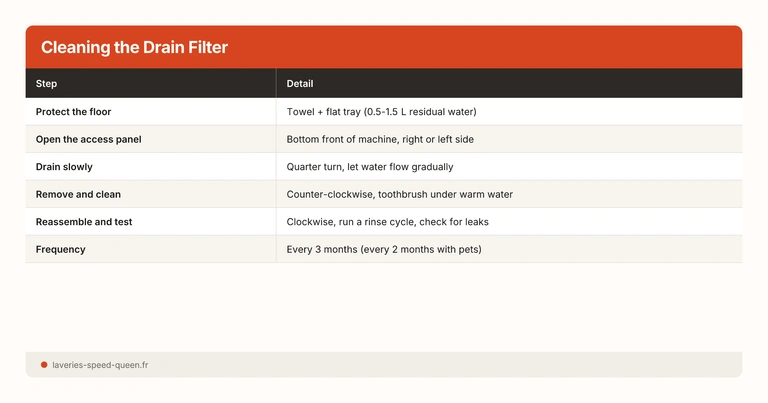
In short: the drain filter should be cleaned every 3 months. It is located at the bottom of the machine (front hatch). Protect the floor (towel
- container), unscrew slowly anti-clockwise, remove debris (coins, lint, hair), and scrub with a brush under warm water. Cleaning takes 10 minutes and prevents drain failures, bad smells, and error codes.
At a Glance
Frequency: every 3 months - or every 2 months if you have pets, young children, or heavy usage.
Location - hatch at the bottom of the machine (front panel), right or left side depending on the brand.
Protect the floor first - 0.5 to 1.5 L of residual water flows out when you open the filter. Towel + shallow container are essential.
Unscrew anti-clockwise - slowly, a quarter turn at a time, to control the water flow.
10 minutes maximum - cleaning the filter is quick. Skipping it can cost 80-200 euros (burnt-out pump replacement).
Why the Drain Filter Matters
The drain filter is the most neglected part of a washing machine - yet it causes the most preventable breakdowns.
What It Does
The drain filter (also called “pump filter”) is a mesh screen between the drum and the drain pump. Its job is to catch small objects (coins, buttons, pins, paper clips) and clumps of fibres (lint, hair) before they reach the pump.
Without it, those objects would enter the drain pump and block or damage it. The drain pump is a small electric motor with an impeller (turbine) that evacuates water from the drum. A coin wedged between the impeller blades stops it instantly. A clump of lint wound around the shaft slows rotation until the motor overheats.
What Accumulates Inside
Over successive washes, the filter collects:
- Lint and textile fibres - every wash releases microfibres from cotton and polyester. Towels, flannel, and worn cotton clothing shed heavily. These fibres form a dense felt inside the filter.
- Hair and pet fur - they wrap around the mesh and the inner walls of the filter.
- Small objects - coins, buttons, safety pins, paper clips, hair pins, staples, small toys, baby socks.
- Tissue residue - paper tissues disintegrate and form a sticky paste that blocks the filter mesh. See our article on the importance of emptying pockets before washing.
- Detergent residue - undissolved powder detergent can form hard deposits inside the filter.
Signs of a Clogged Filter
A dirty filter does not fail overnight - symptoms appear gradually.
Stage 1: Slower Draining
The wash cycle takes longer than usual. The machine needs more time to evacuate water between the wash, rinse, and spin phases. You may not notice at first - but if your usual 1h30 cycle now takes 1h50 or more, the filter is likely clogged.
Stage 2: Laundry Too Wet After Spinning
Spinning is only effective if water can drain during the drum’s ramp-up. With a partially blocked filter, water drains too slowly - laundry comes out abnormally damp despite a 1000+ rpm spin. This is a very clear sign of blockage.
Stage 3: Musty or Sewage Smell
Stagnant water in the drain circuit (between the filter and the pump) ferments. Anaerobic bacteria produce hydrogen sulphide - the characteristic rotten-egg smell. This odour transfers to the laundry and the room where the machine is located. If your machine smells bad despite regular cleaning, the filter is often the culprit.
Stage 4: Error Code and Cycle Stop
The machine stops mid-cycle and displays a drain error code (E21, F21, 5E, F05 depending on the brand). The pump can no longer evacuate the water - the filter is completely blocked. At this point, laundry is stuck in the drum with stagnant water.
The cost of neglect. A clogged filter forces the drain pump to work under strain. The pump motor overheats and eventually burns out. Replacing a drain pump costs 80 to 200 euros (part + labour). Quarterly filter cleaning takes 10 minutes and costs nothing. The maths is simple.
Where to Find the Filter on Your Machine
Front-Loading Machines
The vast majority of front-loaders have the filter behind a small hatch at the bottom right of the front panel, at plinth level. It is a panel 10 to 15 cm wide that opens in one of the following ways:
- Press clip - push the top edge of the hatch and pull towards you.
- Notch - insert a coin or flathead screwdriver into the notch and lever it open.
- Screw - some models (notably Miele) have a fixing screw that must be removed.
By Brand
Samsung
Hatch at bottom right. Emergency drain button (black hose) next to the filter. Drain error code: 5E or SE. The filter unscrews anti-clockwise.
LG
Hatch at bottom left (on most models). Small built-in drain hose. Drain error code: OE. The filter has a handle for easy removal.
Bosch / Siemens
Hatch at bottom right. The filter is round with a flat handle. Drain error code: F18 or E18. Some models have an emergency drain hose.
Whirlpool / Indesit
Hatch at bottom right. The filter unscrews without tools. Drain error code: F05 or F21. No emergency drain hose on most models - water flows out through the filter.
Top-Loading Machines
Top-loading machines do not always have a visible front access hatch. Depending on the model:
- The filter is accessible from the bottom of the machine (you need to tilt or lay it down).
- The filter is built into the central agitator (American-style centre-post machines).
- Some recent models have no user-serviceable filter - they use a self-cleaning system.
Check your machine’s manual if in doubt. The terms to look for are “drain filter”, “pump filter”, or “pump access hatch”.
Step-by-Step Cleaning
What You Need
- Large towel - laid on the floor in front of the machine to absorb water.
- Shallow container - oven tray, baking sheet, or low plastic tub (5 cm max height to fit under the hatch).
- Old toothbrush - to scrub the filter mesh and the cavity.
- Gloves (optional) - the residual water is cold and sometimes smelly.
- Flathead screwdriver (if the hatch has a notch) - or a coin.
Step 1: Disconnect the Power
As a precaution, unplug the machine from the wall socket. This is not strictly necessary (the filter is not connected to any electrical circuit), but it is good practice to prevent any accidental start-up while your hands are inside the filter cavity.
Also turn off the water supply tap (the wall tap the inlet hose is connected to). This prevents any water inflow during the procedure.
Step 2: Protect the Floor
Lay the large towel on the floor, in front of and under the machine. Place the shallow container directly under the filter hatch. The residual water (0.5 to 1.5 litres, sometimes more if the cycle was interrupted) will flow out by gravity as soon as you start unscrewing the filter.
Step 3: Open the Hatch
Open the access hatch according to your machine’s mechanism (clip, notch, or screw). You will see the filter: a cylindrical plug with a handle or a flat grippable surface.
Step 4: Drain the Residual Water
If your machine has a small drain hose next to the filter (a black or grey hose with a cap), use it first:
- Unfold the hose.
- Remove the cap.
- Let the water flow into the container.
- When the water stops flowing, recap the hose and fold it back.
This step evacuates most of the residual water before you open the filter, reducing the risk of flooding.
If your machine does not have a drain hose, go straight to opening the filter - but unscrew very slowly (a quarter turn) and wait for the water to drain gradually. Empty the container between quarter turns if needed.
Step 5: Remove the Filter
Unscrew the filter anti-clockwise (counter-clockwise when viewed from the front). If the filter is stuck (limescale, residue), use rubber gloves for a better grip, or wrap a cloth around the handle. Do not force it with a metal tool - you risk cracking the plastic thread.
Once unscrewed, pull the filter out completely. Place it in the container or the sink.
Step 6: Inspect and Clean the Filter
Remove visible debris by hand: lint, coins, buttons, hair, tissue fragments. You may be surprised by the quantity - a filter left uncleaned for 6 months can contain a ball of lint the size of a fist.
Scrub the filter mesh under warm running water with the old toothbrush. Brush in both directions to dislodge fibres trapped in the grid. If the filter is heavily clogged, soak it for 30 minutes in warm water with a tablespoon of white vinegar↗.
Step 7: Inspect and Clean the Cavity
Do not refit the filter yet. Look inside the cavity (use your phone torch). You will see the drain pump impeller - a small plastic turbine. Check that:
- No object is jammed between the impeller blades (coin, pin, elastic band).
- The impeller spins freely (turn it with your finger - it should rotate with no resistance).
- The cavity walls are clean (remove lint and stuck residue with the toothbrush).
If an object is jammed in the blades and you cannot remove it with your fingers, use fine-nosed pliers. Do not force - the plastic blades are fragile.
Step 8: Refit the Filter
Screw the filter back in clockwise, firmly but without forcing. The filter must be securely in place and not wobble when you touch it - a poorly tightened filter causes a water leak on the next cycle.
Close the access hatch.
Step 9: Check for Leaks
Plug the machine back in and run a quick rinse cycle (the shortest available). Watch the filter hatch during the cycle - no water should seep out. If water leaks, open the hatch, unscrew and retighten the filter, checking that the seal (rubber ring around the filter) is properly seated and not deformed.
Cleaning Frequency
The standard frequency is quarterly (every 3 months). Here are the adjustments:
| Situation | Recommended Frequency |
|---|---|
| Standard use (4-5 loads/week, family) | Every 3 months |
| Pets (fur in the laundry) | Every 2 months |
| Young children (cloth nappies, bibs) | Every 2 months |
| Heavy use (8+ loads/week) | Every 2 months |
| Single person (2-3 loads/week) | Every 4 months |
| Lots of towels / flannel | Every 2 months |
Tip: combine filter cleaning with your quarterly machine clean. When you run an empty cleaning cycle, take the opportunity to also clean the filter, the door seal, and the detergent drawer. In 30 minutes, the entire machine is clean.
Mistakes to Avoid
- Opening the filter during a cycle - the drum water (several litres, potentially hot) will flood the floor. Wait for the cycle to finish and unplug.
- Unscrewing all at once without protecting the floor - 0.5 to 1.5 L of residual water flows out immediately. Towel + shallow container are essential.
- Forcing a stuck filter with a metal tool - the filter thread is plastic. Forcing it breaks the thread. Use rubber gloves for grip, or pour a little vinegar around the thread to dissolve limescale.
- Refitting the filter without checking the impeller - an object jammed in the pump blades prevents draining even with a clean filter. Always inspect the cavity.
- Skipping the leak check after refitting - a poorly tightened filter or a displaced seal causes a leak on every cycle. Run a quick rinse and watch.
- Ignoring the smell coming from the filter - the smell means organic residue is fermenting in stagnant water. Until the source is cleaned, the smell will return.
Prevention: Reducing Filter Build-Up
The best maintenance is avoiding build-up in the first place. Here are the preventive habits:
Empty Pockets - Always
The number-one source of filter blockage is objects left in pockets. Coins, paper tissues, paper clips, pins - they all end up in the filter. Make a habit of turning out all trouser and jacket pockets before loading the machine.
Use Mesh Laundry Bags
Mesh laundry bags do not just protect delicate clothing - they also stop small objects (loose buttons, bra hooks) from reaching the filter. Use a bag for small items like baby socks, which can slip past the drum seal and lodge in the drain circuit.
Brush High-Shedding Garments Before Washing
New cotton clothing, new towels, and flannel shed large quantities of fibres during the first few washes. Brush them before washing to remove loose fibres. For the broader problem of pet hair on laundry, a pass with a lint roller before washing significantly reduces the filter load.
Do Not Overdose Detergent
Overdosing powder detergent creates undissolved residue that builds up in the filter. Follow the recommended dosage and favour liquid detergent for cold washes (it dissolves better at low temperatures).
When the Filter Is Not Enough: Diagnosing a Drain Problem
If cleaning the filter does not solve the drain problem, other causes are possible.
Kinked or Blocked Drain Hose
The drain hose (the large grey hose running from the machine to the standpipe or wall outlet) may be kinked (furniture pushed against it, an object fallen behind the machine) or blocked (lint and detergent residue built up over the years). Check it is not crushed and blow through it to verify airflow.
Burnt-Out Drain Pump
If the filter is clean, the hose is clear, and the machine still will not drain, the drain pump may have failed. Telltale symptom: no pump noise (normally, you hear a hum when the machine drains). Replacement requires a technician.
Control Board
More rare - a control board fault prevents power from reaching the pump. If the machine shows a drain error code while the filter, hose, and pump are all functional, it is likely an electronic problem.
The Filter and Bad Smells: The Often-Overlooked Link
If your machine smells bad despite a seal cleaning, a detergent drawer clean, and an empty cycle, the drain filter is the next suspect.
Stagnant water in the filter and the drain circuit is an ideal breeding ground for anaerobic bacteria. These bacteria produce hydrogen sulphide (rotten-egg smell) and sulphur compounds that travel back up through the drum. Cleaning the filter removes the stagnant water and organic residue that feed these bacteria.
For a complete machine maintenance routine, follow our guide on cleaning your washing machine which covers all zones (drum, seal, drawer, filter) in a single session.
At the Laundromat: One Less Thing to Worry About
At a self-service laundromat, the drain filter is maintained by the facility manager. This is a rarely mentioned but real advantage: you do not have to worry about machine maintenance. Professional machines are inspected regularly and filters are cleaned on a maintenance schedule - ensuring optimal wash and drain performance on every cycle.
As an Amazon Associate, we earn a small commission on purchases made through affiliate links in this article — at no extra cost to you. This helps us maintain this site and produce free guides.
Our laundromats in Blagnac, Croix-Daurade and Montaudran are equipped with professional Speed Queen machines, regularly maintained and inspected. You get optimal performance without worrying about filters, descaling, or cleaning. Payment contactless card or cash. See our prices.
Sources and References
- How to clean your washing machine - complete guide
- How to clean the washing machine door seal
- Detergent dosage guide
- How to remove pet hair from laundry
- How to descale your washing machine
- Drain pump operation - induction motor and turbine (technical documentation)
- Bacterial biofilm formation in stagnant aqueous environments - anaerobic bacteria and hydrogen sulphide